✨ Creating your first animation
Create and animation is a really easy thing, you just need to use the /animation create command. There are two types of animations, plain text animations, and texture pack animations, just select plain or texture option in the /animation create command.
Modifying the config
If you make changes on any config file, you must execute /animation reload for those changes to be applied. If you are modifying texturepack animations, check building the texture pack.
📝 Plain text animations
Plain text animations are the simple type of animation you can create with Hyrex Animations. With this type you can show plain text tou your users. To create an animation, execute /animation create plain <name> <fps> and the animation will be added to the plain_animations.yml file of the plugin path. The initial config should look like this:
animations:
  test: # We created an animation called test for our example
    name: test
    fps: 1.0
    use-minimessage: false
    use-papi: false
    frames: []
    sounds: {}
    commands: {}
🎞️ Adding frames
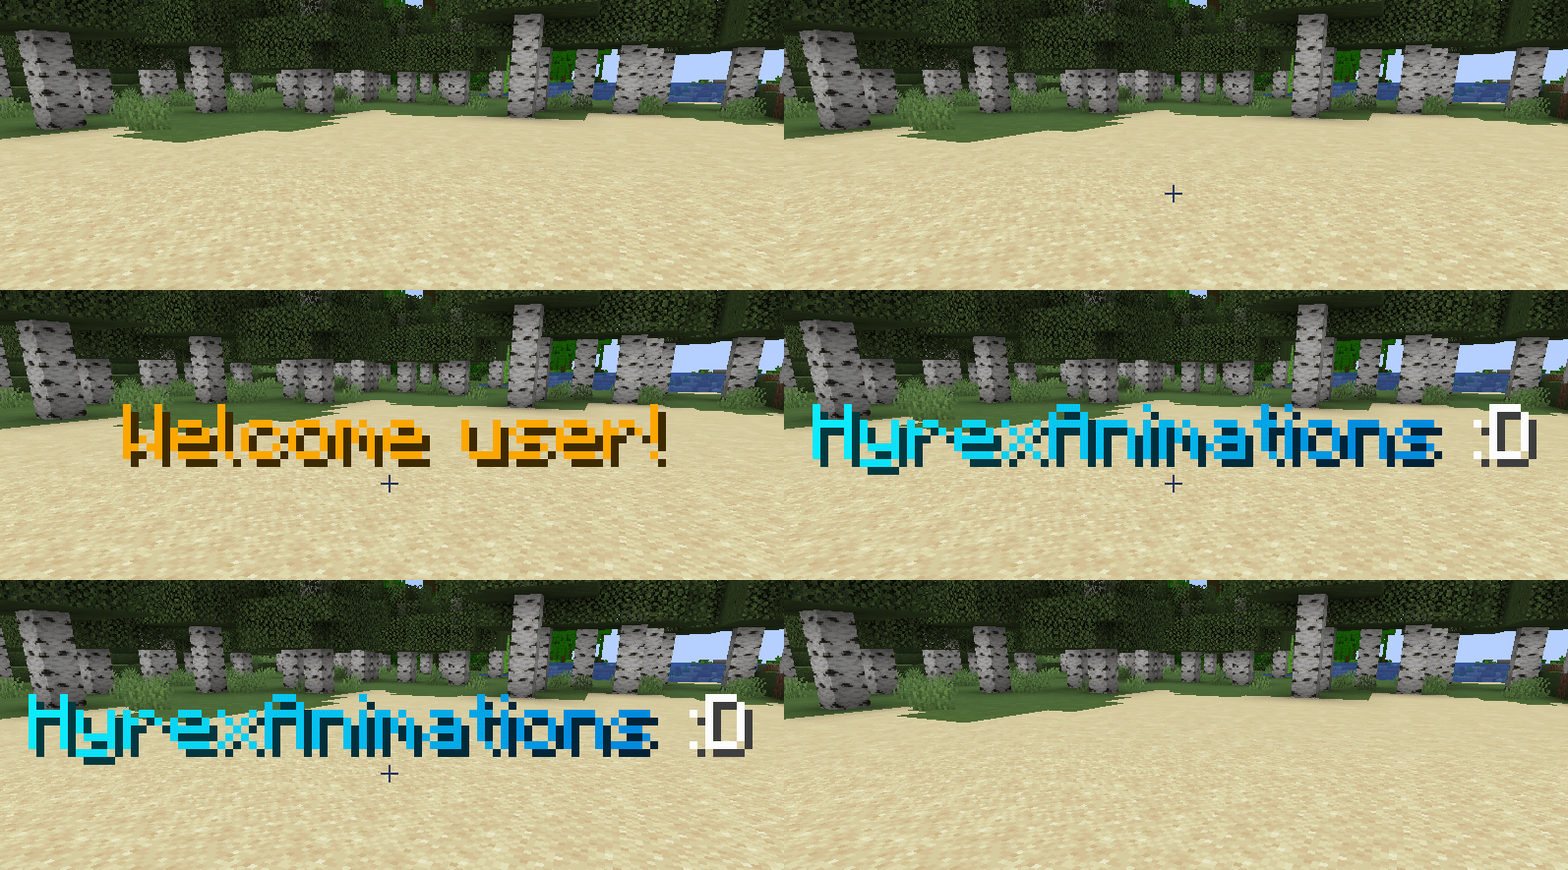
Adding frames to your animations is very simple, you just need to add each frame to the frames list. For our example we will add some welcome messages.
animations:
  test:
    name: test
    fps: 1.0
    use-minimessage: false
    frames:
      - "Welcome user!"
      - "Thanks for using"
      - "Hyrex Animations :D"
    sounds: {}
    commands: {}
👀 Showing your animation
This is the most beautifull part of using the plugin, showing your animations to your players. Here you can choose between showing it to a single user, to all users in a world, or to all players connected to the server. Even, you can select which players will see the animation by creating Custom Conditions. But for showing an animation, you need a place to show it, you can choose between a title, a subtitle, or in the actionbar.
For this example, we'll just show the animation to ourself as a title, so you just need to execute /animation show player <yourUsername> test title. After that, enjoy your first animation.

🖼️ Texture pack animations
Texture pack animations are the complex but coolest animations you can create with Hyrex Animations. You can add as many frames as you want, as many custom sounds as you want, and merge it with your texturepack manager plugin (like Oraxen or ItemsAdder) automatically, just running /animation reload.
To create a texture pack animation, just type /animation create texture <name> <fps>. Then, go to the folder plugins/HyrexAnimations/animations/<your-animation>/, and you will see an animation.yml file, a frames folder, and a sounds folder.
🎞️ Adding frames
To add your custom frames to the animation you just need your frame list ordered alphabetically, cause the plugin will link each frame to each character by the first file alphabetically to the last ordered, the best way to do this is by adding the frame number at the end of the file name, like:
sign_animation_01.pngsign_animation_02.pngsign_animation_03.png
Image Size
No frame can exceed 256 x 256 pixels.
The next thing you have to do is to configure the ascent and the height of the frames, in any case, the ascent cannot be higher than the height.
🔊 Custom sounds
You can also add custom sounds to your animations, the only thing you have to do is place you .ogg file into the sounds/ folder of your animation, then you can identify it by the next format: hyrex_animation:<animation_name>.<sound_name>, so for example, the sound.ogg file of the welcome_sign animation can be played in-game by hyrex_animation:welcome_sign.sound.
The last step is add the sound to the animation sounds list as explained in 🔊 Playing sounds.
🖌️ Frame modifiers
Frame modifiers are the last option in texture pack animation customization, it lets you to modify your custom frame adding text, changing its color, or parsing placeholders on it. Just go to the animation.yml file, and in the frame-modifiers section, add the frame index (being 0 the first frame), the text before and after, for example.
animation:
  fps: 24.0
  use-minimessage: false
  use-papi: false
  sounds:
    0:
      - namespace: hyrex_animations
        value: welcome_sign.sound
        source: PLAYER
        pitch: 1.0
  commands: {}
  frame-modifiers:
    5:
      before: "<aqua>" # The sixth frame will be colored in aqua
    10:
      after: ":D" # After the 11th frame image will appear a happy face :D
  texture:
    ascent: 25
    height: 60
📐 Offset
With offset you can move the animation wherever you want.
WARNING
Currently Hyrex Animations only supports X axis offset, but we are working on adding Y offset too.
You can set the X offset in the animation.yml file, with a range from -1250 to 1250.
animation:
  fps: 24.0
  use-minimessage: false
  use-papi: false
  sounds: {}
  commands: {}
  frame-modifiers: {}
  texture:
    ascent: 25
    height: 60
  offset:
    x: -20 # The animation will be moved to the left
📦 Building the texture pack
Any time you execute /animation reload, all resources are built to the pack folder of the plugin folder, if you are using a standalone texturepack, be sure to add the all its content to your texturepack assets folder.
If you are using a plugin like Oraxen or ItemsAdder, you can use the merge_resource_pack option of the config.yml file, which will copy all the content to the specified path from the plugins/ folder, here you can copy each plugin correspond path:
- ☄️ Oraxen:
Oraxen/pack/assets - ✨ ItemsAdder:
ItemsAdder/contents/hyrex_animations/resourcepack/assets